Cahier 2016 groupe n°9 : Différence entre versions
(→6.8 Configuration d'un PCBX) |
(→6.8 Configuration d'un PCBX) |
||
| (9 révisions intermédiaires par le même utilisateur non affichées) | |||
| Ligne 480 : | Ligne 480 : | ||
Connexion avec le téléphone portable | Connexion avec le téléphone portable | ||
| − | [[fichier:Ssidspidermanconnexionportable.png | | + | [[fichier:Ssidspidermanconnexionportable.png | 200px]] |
== Serveur DHCP == | == Serveur DHCP == | ||
| Ligne 486 : | Ligne 486 : | ||
Configuration dans le fichier dhcpd.conf | Configuration dans le fichier dhcpd.conf | ||
| − | option domain-name "l-epee-d-ophile.net" | + | option domain-name "l-epee-d-ophile.net" |
| − | option domain-name-servers 193.48.57.169 | + | option domain-name-servers 193.48.57.169 |
| − | subnet 10.60.8.0 netmask 255.255.255.0 { | + | subnet 10.60.8.0 netmask 255.255.255.0 { |
| − | + | range 10.60.8.11 10.60.8.150; | |
| − | + | option routers 10.60.8.1; | |
| − | } | + | } |
On notifie ensuite wlan2 dans /etc/default/isc-dhcp-server. | On notifie ensuite wlan2 dans /etc/default/isc-dhcp-server. | ||
| − | Pour tester, on se sert de l'interface | + | Pour tester, on se sert de l'interface wlan2 du eeePC. |
On se place donc dans /etc/network/interfaces et on spécifie: | On se place donc dans /etc/network/interfaces et on spécifie: | ||
| − | + | auto wlan2 | |
| − | iface | + | iface wlan2 inet dhcp |
address 10.60.8.8 | address 10.60.8.8 | ||
netmask 255.255.255.0 | netmask 255.255.255.0 | ||
| Ligne 509 : | Ligne 509 : | ||
| + | On arrive à ce connecter : | ||
| + | [[fichier: Dhcp.png |200 px|]] | ||
== 6.8 Configuration d'un PCBX == | == 6.8 Configuration d'un PCBX == | ||
| + | |||
| + | On installe Asterisk sur la machine virtuelle. | ||
| + | |||
| + | apt-get install asterisk | ||
| + | |||
| + | Puis on lance asterisk avec : | ||
| + | |||
| + | asterisk -vvvvvvc | ||
| + | |||
| + | On modifie le fichier sip.conf pour ajouter les utilisateurs: | ||
| + | |||
| + | [general] | ||
| + | hasvoicemail=yes | ||
| + | hassip=yes | ||
| + | hasiax=yes | ||
| + | callwaiting=yes | ||
| + | threewaycalling=yes | ||
| + | callwaitingcallerid=yes | ||
| + | transfer=yes | ||
| + | canpark=yes | ||
| + | cancallforward=yes | ||
| + | callreturn=yes | ||
| + | callgroup=1 | ||
| + | pickupgroup=1 | ||
| + | nat=yes | ||
| + | |||
| + | [666] | ||
| + | type=friend | ||
| + | host=dynamic | ||
| + | dtmfmode=rfc2833 | ||
| + | disallow=all | ||
| + | allow=ulaw | ||
| + | fullname=valentin | ||
| + | username=val | ||
| + | secret=glopglop | ||
| + | context=work | ||
| + | |||
| + | [665] | ||
| + | type=friend | ||
| + | host=dynamic | ||
| + | dtmfmode=rfc2833 | ||
| + | disallow=all | ||
| + | allow=ulaw | ||
| + | fullname=alexandre | ||
| + | username=alex | ||
| + | secret=glopglop | ||
| + | context=work | ||
| + | |||
| + | Puis nous modifions le fichier extensions.conf pour ajouter notre contexte. | ||
| + | |||
| + | [work] | ||
| + | exten=>_6XX,1,Dial(SIP/${EXTEN},20) | ||
| + | exten => _6XX,2,Hangup() | ||
| + | |||
| + | Cela signifie que la première action (dial) lance d'abord l'appel puis la 2e action abandonne (Hangup) au bout de 20 secondes. | ||
| + | On relance Asterisk | ||
| + | |||
| + | service asterisk restart | ||
| + | |||
| + | On utilise ensuite l'application mobile "CSipSimple" pour tester notre configuration. Nous arrivons à nous appeler. | ||
| + | |||
| + | Voici le fichier log : | ||
| + | |||
| + | [[fichier:LogAsterix.jpg]] | ||
| + | |||
| + | Photo de l'appel pris sur un téléphone : | ||
| + | |||
| + | [[fichier:Call.png| 200px]] | ||
Version actuelle datée du 6 janvier 2017 à 15:36
cours utilisé : http://vantroys.polytech-lille.net/TIIR/cisco.pdf
Sommaire
WIFI
Présentation
Le but du projet consiste à créer un accès wifi sur un commutateur OVH 6006 afin de permettre aux utilisateurs de se connecter à distance.
Architecture de la promo IMA5 2016/2017 :
[schema.png]
Matériel
Cisco Aironet 1600
Planning
Configuration de la borne Wifi
Connexion sur la borne wifi cisco 1600 par USB:
#su
#minicom -os
paramètres : /dev/ttyUSB0, 9600 Bauds, no flow control, no parity, 1 bit stop, 8 data bits
Commande sur la borne Wifi :
ap>show ip interface
BVI1 is down, line protocol is down
Internet address is 193.48.65.201/26
Broadcast address is 255.255.255.255
Address determined by configuration file
MTU is 1500 bytes
...
ap> show interfaces
On remarque qu'il y a 4 interfaces sur la borne wifi :
- BVI1
- Dot11Radio0
- Dot11Radio1
- GigabitEthernet0
En attente de notre configuration sur le commutateur, voici la liste des commandes que nous utiliserons afin de configurer la borne Wifi:
ap> enable
ap# configure terminal
ap(config)# interface "nom_interface"
ap(config-if)# ip address "ip" "masque"
ap(config-if)# description
ap(config-if)# no shutdown
ap(config-if)# exit
ap(config)# exit
ap#
Création de la machine virtuelle
Création de la machine virtuelle
Connexion au serveur cordouan:
ssh root@cordouan.insecserv.deule.net
Création de la VM:
xen-create-image --hostname=Spiderman --ip=193.48.57.169 --netmask=255.255.255.240 --gateway=193.48.57.172
  --dir=/usr/local/xen --mirror=http://debian.polytech-lille.fr/debian/ --dist=jessie
demarrer la vm:
xl create /etc/xen/Spiderman.cfg
lancer la vm :
xl console Spiderman
Création des partitions logiques pour la machine virtuelle:
lvextend -L 10G/dev/virtual/ima5-Spiderman-var
on démarre la console :
xl etc/xen/console Spiderman
lvcreate -L 10G -n /dev/virtual/ima5-Spiderman-n
Ajouts des partitions à la configuration de la machine virtuelle en ajoutant la commande suivante dans etc/xen/Spiderman.cfg:
'phy:/dev/virtual/ima5-Spiderman-home,xvdb,w',
Craquage WPA
Configuration de la wifi:
show cdp neigbors detail
show run int BVI1
Wep :
dans : /documents/test_crack# :
inconfig
airmon-ng check kill
airmon-ng check
airmon-ng start wlan1
airodump-ng-encrypt wep mon0
airodump-ng -w out -c 13 .... bssid ... mon0
craquage WPA : Problème lors de la recherche de la clef
                                Aircrack-ng 1.2 beta3


                  [07:44:09] 100000000keys tested (3691.35 k/s)


                      Current passphrase: 99999641


     Master Key     : 79 24 D2 74 A2 60 BE 48 FA FE 5D 40 96 C0 62 26
                      5A 9C F4 93 12 BC 21 9E 69 D5 25 D8 F5 81 3E 40

     Transient Key  : 67 C6 23 6D 28 FB E8 64 4D 0F F2 DF D0 F8 C8 4C
                      7A 25 77 49 5A A6 70 65 60 70 F7 35 87 42 BA B2
                      99 B6 CA 7E 1A 86 73 E7 1D E8 4C 2E 94 FE E4 76
                      27 AC 29 BD 65 EC 9F BD 7D 80 6C C4 22 FE B1 A7

     EAPOL HMAC     : BA 13 78 91 61 B2 EE F2 30 B6 B8 FD 63 ED D7 5B

Passphrase not in dictionary
Configuration du site web
Installation de bind9 sur la VM xen.
Modification du fichier /etc/bind/named.conf.local :
zone "l-epee-d-ophile-net" {
type master;
file "/etc/bind/db.l-epee-d-ophile.net";
allow-transfer { 217.70.177.40; };
};
zone "57.48.193.in-addr.arpa" {
type master;
notify no;
file "/etc/bind/db.193";
};
Créez le fichier de zone /etc/bind/db.l-epee-d-ophile.net
$TTL	10800
@	IN	SOA	www.l-epee-d-ophile.net. root.l-epee-d-ophile.net. (
1		; Serial
10800		; Refresh
86400		; Retry
2419200		; Expire
604800 )	; Negative Cache TTL
;
@	IN	NS	www.l-epee-d-ophile.net.
@	IN	A	193.48.57.169
Redémarrer bind
/etc/init.d/bind9 restart
Installation d'apache et php5:
apt-get install apache2
apt-get install php5
Création d'un glue record de notre domaine Gandi :
nom de serveur : ns.l-epee-d-ophile.net adresse IP : 193.48.57.169
Changez la configuration des serveurs du domaine Gandi
DNS1: ns1.l-epee-d-ophile.net DNS2: ns6.gandi.net
Commande:
root@Spiderman:/etc/bind# nslookup l-epee-d-ophile.net
Server:		193.48.57.34
Address:	193.48.57.34#53

Non-authoritative answer:
Name:	l-epee-d-ophile.net
Address: 217.70.184.38
SSL
root@Spiderman:/etc/apache2/ssl# ls
gandi.crt  serveur.csr	serveur.key
root@Spiderman:/etc/apache2/ssl# pwd
/etc/apache2/ssl
root@Spiderman:/etc/apache2/ssl# ^C
root@Spiderman:/etc/apache2/ssl#
<VirtualHost *:443>
  ServerName l-epee-d-ophile.net
  ServerAlias www.l-epee-d-ophile.net
  SSLEngine on
  SSLCertificateFile "/etc/apache2/ssl/l-epee-d-ophile.net.crt"
  SSLCertificateKeyFile "/etc/apache2/ssl/l-epee-d-ophile.net.key"
  SSLCertificateChainFile "/etc/apache2/ssl/GandiStandardSSLCA2.pem"
</VirtualHost>
Configuration https du site web
Génération des clefs :
root@Spiderman:/etc/bind/l-epee-d-ophile.net.dnssec#dnssec-keygen -a RSASHA1 -b 2048 -r /dev/urandom -f KSK -n ZONE l-epee-d-ophile.net
root@Spiderman:/etc/bind/l-epee-d-ophile.net.dnssec#dnssec-keygen -a RSASHA1 -b 1024 -r /dev/urandom -n ZONE l-epee-d-ophile.net
Signature de la zone :
root@Spiderman:/etc/bind/l-epee-d-ophile.net.dnssec# dnssec-signzone -o l-epee-d-ophile.net -k l-epee-d-ophile.net-ksk ../db.l-epee-d-ophile.net l-epee-d-ophile.net-zsk
Verifying the zone using the following algorithms: RSASHA1.
Zone fully signed:
Algorithm: RSASHA1: KSKs: 1 active, 0 stand-by, 0 revoked
                    ZSKs: 1 active, 0 stand-by, 0 revoked
../db.l-epee-d-ophile.net.signed
dnssec :
root@Spiderman:/etc/bind# dig DNSKEY l-epee-d-ophile.net @localhost

; <<>> DiG 9.9.5-9+deb8u8-Debian <<>> DNSKEY l-epee-d-ophile.net @localhost
;; global options: +cmd
;; Got answer:
;; ->>HEADER<<- opcode: QUERY, status: NOERROR, id: 50084
;; flags: qr aa rd ra; QUERY: 1, ANSWER: 2, AUTHORITY: 0, ADDITIONAL: 1

;; OPT PSEUDOSECTION:
; EDNS: version: 0, flags:; udp: 4096
;; QUESTION SECTION:
;l-epee-d-ophile.net.		IN	DNSKEY

;; ANSWER SECTION:
l-epee-d-ophile.net.	10800	IN	DNSKEY	256 3 5 AwEAAezQNszlMCkzdf6kJCrsqDuq+mL3J1P1/6C7hoA4GLpS4yqkbjs8 kk0gIq992Aq33DosjRtxnhnLuhmhq8asYut/ImoNSKJiAg0dyKx2dzgH wtbQ6L/+y/3f+8qzfA3CbZspivVYpt984hE7BucgFYGhO4NvDLPrlDv5 X/MpCBBf
l-epee-d-ophile.net.	10800	IN	DNSKEY	257 3 5 AwEAAfQXibMSzmfb8EbpamHRkClOYPGUgxnPo+cOXPhnxkza5ETWjrJs eNG+jfOnKHmKkYQylH9a3dLmPUdEOKP2JBWVNU8H/HwmpaQQUhQw3i7C k8p1CeVCT77XTvfGEocjKKbBvbvoZpOt6SWTC/yrWWamlnXIcoK4wqby XVPAc4L25iNnRdFWD72TLB2rJmfGnO6Zv+BVTYFauALtoVA+rNRtf7gl 2M9eUBacnlkHbAWZF9g7tuEAfef7Ct4gHwmiOn1zsHcncA7hfpNiESs2 hn30qkqC+sMb1VsavslNjXfkGzIyh4zpkIY11wMQBx9Z01E894YDHfgw vEagKTUxXVs=

;; Query time: 0 msec
;; SERVER: 127.0.0.1#53(127.0.0.1)
;; WHEN: Mon Nov 28 17:06:51 CET 2016
;; MSG SIZE  rcvd: 472
Réalisations
6.1 Sécurisation des données
lvcreate -L 1G -n /dev/virtual/Spiderman-1 -v
lvcreate -L 1G -n /dev/virtual/Spiderman-2 -v
lvcreate -L 1G -n /dev/virtual/Spiderman-3 -v
Modification du fichier Spiderman.cfg afin d'ajouter les nouvelles partitions :
...
disk        = [
                  'file:/usr/local/xen/domains/Spiderman/disk.img,xvda2,w',
                  'file:/usr/local/xen/domains/Spiderman/swap.img,xvda1,w',
'phy:/dev/virtual/ima5-Spiderman-home,xvdb,w',
'phy:/dev/virtual/ima5-Spiderman-var,xvdc,w',
'phy:/dev/virtual/Spiderman-1,xvdd,w',
'phy:/dev/virtual/Spiderman-2,xvde,w',
'phy:/dev/virtual/Spiderman-3,xvdf,w',
              ]
...
Maintenant il faut installer mdadm afin de mettre en place notre RAID logiciel.
apt-get install mdadm
On vérifie si il son bien présent avec un fdisk -l :
Disk /dev/xvdd: 1 GiB, 1073741824 bytes, 2097152 sectors
Units: sectors of 1 * 512 = 512 bytes
Sector size (logical/physical): 512 bytes / 512 bytes
I/O size (minimum/optimal): 512 bytes / 512 bytes
Disk /dev/xvde: 1 GiB, 1073741824 bytes, 2097152 sectors
Units: sectors of 1 * 512 = 512 bytes
Sector size (logical/physical): 512 bytes / 512 bytes
I/O size (minimum/optimal): 512 bytes / 512 bytes
Disk /dev/xvdf: 1 GiB, 1073741824 bytes, 2097152 sectors
Units: sectors of 1 * 512 = 512 bytes
Sector size (logical/physical): 512 bytes / 512 bytes
I/O size (minimum/optimal): 512 bytes / 512 bytes
Après plusieurs message d'erreur de la commande :
root@Spiderman:~# mdadm --create /dev/md0 --level=5 --assume-clean --raid-devices=3 /dev/xvdd /dev/xvde /dev/xvdf
mdadm: unexpected failure opening /dev/md0
Il fallait installer :
apt-get install linux-image-3.16.0-4-amd64
On vérifie si tout est bon :
root@Spiderman:~# mdadm --detail /dev/md0
/dev/md0:
        Version : 1.2
  Creation Time : Wed Nov 30 18:16:47 2016
     Raid Level : raid5
     Array Size : 2095104 (2046.34 MiB 2145.39 MB)
  Used Dev Size : 1047552 (1023.17 MiB 1072.69 MB)
   Raid Devices : 3
  Total Devices : 3
    Persistence : Superblock is persistent

    Update Time : Wed Nov 30 18:16:47 2016
          State : clean
 Active Devices : 3
Working Devices : 3
 Failed Devices : 0
  Spare Devices : 0

         Layout : left-symmetric
     Chunk Size : 512K

           Name : Spiderman:0  (local to host Spiderman)
           UUID : 0affe846:df8a3d12:fa601836:4085ed0d
         Events : 0

    Number   Major   Minor   RaidDevice State
       0     202       48        0      active sync   /dev/xvdd
       1     202       64        1      active sync   /dev/xvde
       2     202       80        2      active sync   /dev/xvdf
On formate en ext4 (système de fichier linux) notre raid :
mkfs.ext4 /dev/md0
maintenant on doit déclarer notre volume dans /etc/fstab afin que md0 soit monter au démarrage
/dev/md0 /media/raid ext4 defaults 0 1
Une fois le dossier "raid" créer dans /media/ puis on monte la partition :
mount /dev/md0 /media/raid
On peut tester le raid logiciel
vi /media/raid/lol.sh
6.2 Sécurisation des données
Pour le cryptage des données, nous avons besoin de GParted ainsi que cryptsetup. Nous pouvons vérifier l'emplacement de notre carte SD avec la commande : dmesg.
Nous créons une unique partition sur la carte SD de l'eeePC:
root@lamproie:/home/pifou# cryptsetup create spiderman /dev/mmcblk1
On renseigne une phrase secrete "alex" :
root@lamproie:/# cryptsetup luksOpen /dev/sdb1 spiderman
On ouvre la partition Luks
root@lamproie:/# mkfs.ext4 /dev/mapper/crypt_sd
Nous pouvons maintenant monter la partition:
root@lamproie:/# mount /dev/mapper/spiderman /mnt
Pour ensuite créer des fichiers :
root@lamproie:/# vi /mnt/spider.txt
Pour finir, nous pouvons démonter la carte SD et fermer notre partition :
Enfin, nous démontons la carte SD et fermons la partition Luks :
root@lamproie:/# umount /mnt
root@lamproie:/# cryptsetup luksClose spiderman
6.6 Sécurisation Wifi par WPA2-EAP
Configuration de radius : On rajoute dans le fichier /etc/freeradius/clients.conf
client E304 {
        ipaddr  = 10.60.1.6
        secret  = glopglop
}
Puis dans le fichier /etc/freeradius/users on rajoute Spiderman
spiderman Cleartext-Password := "pasglop"
On modifie le fichier eap.conf afin de modifier le protocole d'identification en rajoutant :
default_eap_type = peap
Test de FreeRadius en localhost :
root@Spiderman:/etc/freeradius# radtest spiderman pasglop localhost 0 testing123
Sending Access-Request of id 38 to 127.0.0.1 port 1812
	User-Name = "spiderman"
	User-Password = "pasglop"
	NAS-IP-Address = 193.48.57.169
	NAS-Port = 0
	Message-Authenticator = 0x00000000000000000000000000000000
rad_recv: Access-Accept packet from host 127.0.0.1 port 1812, id=38, length=20
Configuration de notre borne Wifi :
conf t

aaa new-model
aaa authentication login eap_spiderman group radius_spiderman
radius-server host 193.48.57.169 auth-port 1812 acct-port 1813 key glopglop
aaa group server radius radius_spiderman
server 193.48.57.169 auth-port 1812 acct-port 1813


exit

dot11 ssid Spiderman
vlan 8
authentication open eap eap_spiderman
authentication network-eap eap_spiderman
authentication key-management wpa
mbssid guest-mode

exit

interface Dot11Radio0
encryption vlan 8 mode ciphers aes-ccm tkip
ssid spiderman

exit

interface Dot11Radio0.8
encapsulation dot1Q 8
no ip route-cache
bridge-group 8
bridge-group 8 subscriber-loop-control
bridge-group 8 spanning-disabled
bridge-group 8 block-unknown-source
no bridge-group 8 source-learning
no bridge-group 8 unicast-flooding

exit

interface GigabitEthernet0.8
encapsulation dot1Q 8
bridge-group 8

exit

exit
Configuration du eepc :
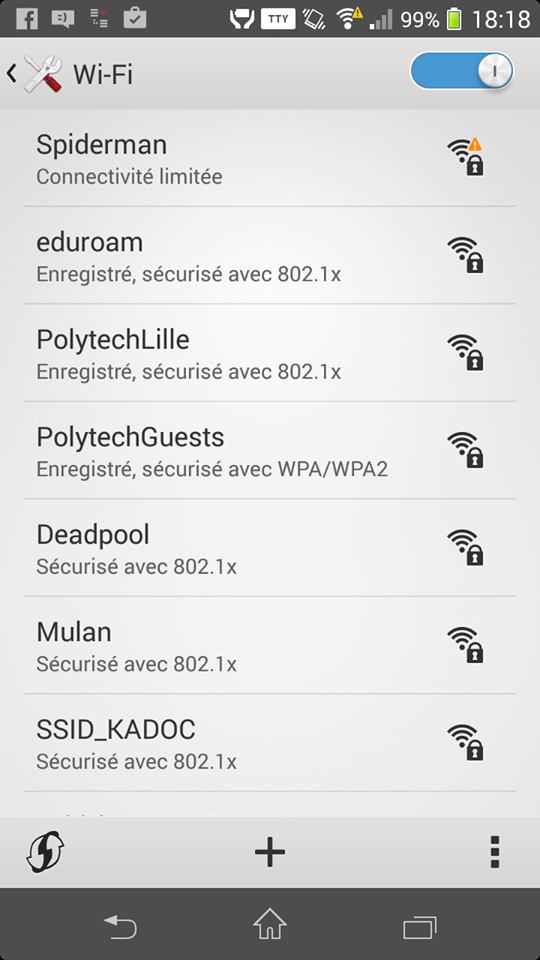
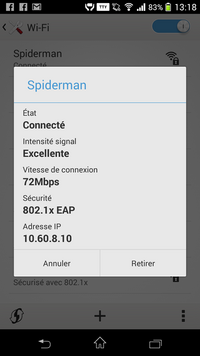
Connexion avec le téléphone portable
Serveur DHCP
Configuration dans le fichier dhcpd.conf
option domain-name "l-epee-d-ophile.net"
option domain-name-servers 193.48.57.169
subnet 10.60.8.0 netmask 255.255.255.0 {
 range 10.60.8.11 10.60.8.150;
 option routers 10.60.8.1;
}
On notifie ensuite wlan2 dans /etc/default/isc-dhcp-server.
Pour tester, on se sert de l'interface wlan2 du eeePC. On se place donc dans /etc/network/interfaces et on spécifie:
auto wlan2
iface wlan2 inet dhcp
 address 10.60.8.8
 netmask 255.255.255.0
 gateway 10.60.8.1
 wpa-ssid Spiderman
 wpa-key-mgmt WPA-EAP
 wpa-eap PEAP
 wpa-identity spiderman
 wpa-password pasglop
On arrive à ce connecter :
6.8 Configuration d'un PCBX
On installe Asterisk sur la machine virtuelle.
apt-get install asterisk
Puis on lance asterisk avec :
asterisk -vvvvvvc
On modifie le fichier sip.conf pour ajouter les utilisateurs:
[general]
hasvoicemail=yes
hassip=yes
hasiax=yes
callwaiting=yes
threewaycalling=yes
callwaitingcallerid=yes
transfer=yes
canpark=yes
cancallforward=yes
callreturn=yes
callgroup=1
pickupgroup=1
nat=yes

[666]
type=friend
host=dynamic
dtmfmode=rfc2833
disallow=all
allow=ulaw
fullname=valentin
username=val
secret=glopglop
context=work

[665]
type=friend
host=dynamic
dtmfmode=rfc2833
disallow=all
allow=ulaw
fullname=alexandre
username=alex
secret=glopglop
context=work
Puis nous modifions le fichier extensions.conf pour ajouter notre contexte.
[work]
exten=>_6XX,1,Dial(SIP/${EXTEN},20)
exten => _6XX,2,Hangup()
Cela signifie que la première action (dial) lance d'abord l'appel puis la 2e action abandonne (Hangup) au bout de 20 secondes. On relance Asterisk
service asterisk restart
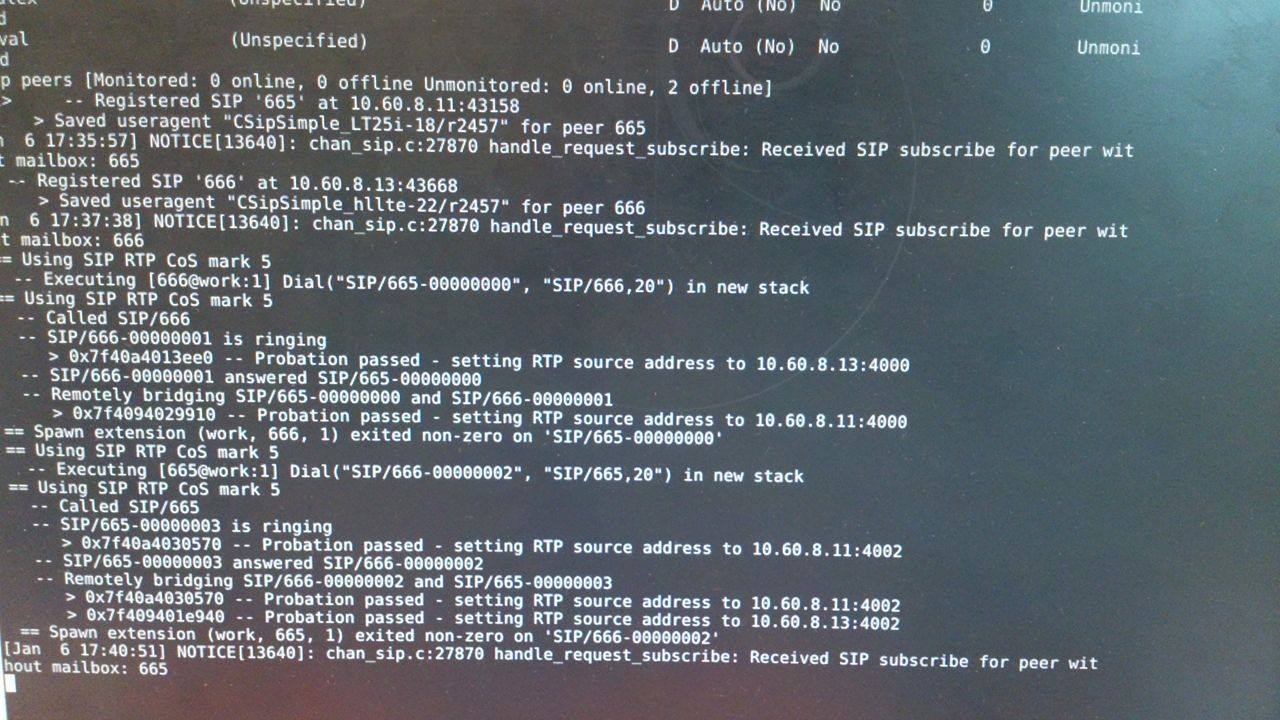
On utilise ensuite l'application mobile "CSipSimple" pour tester notre configuration. Nous arrivons à nous appeler.
Voici le fichier log :
Photo de l'appel pris sur un téléphone :


